About Heater Box Restoration
About Heater Box Restoration
 Heater
boxes are "peripheral" engine components often taken for granted in engine
rebuilding and vintage VW restorations. All too often correct, functional
and nice looking heater boxes are overlooked in even the best of restorations.
And the available pool of good used boxes and restoration parts is quickly
shrinking. Zarwerks.com has invested heavily in developing and re-producing
the parts needed to correctly restore the early heater boxes. This page
will hopefully answer any questions that you may have about what boxes
are restored, how we restore them and what to expect from us in terms of
restored boxes and parts. Much of this applies to boxes that we might
restore for you, as well as the restored boxes we sell outright. Heater
boxes are "peripheral" engine components often taken for granted in engine
rebuilding and vintage VW restorations. All too often correct, functional
and nice looking heater boxes are overlooked in even the best of restorations.
And the available pool of good used boxes and restoration parts is quickly
shrinking. Zarwerks.com has invested heavily in developing and re-producing
the parts needed to correctly restore the early heater boxes. This page
will hopefully answer any questions that you may have about what boxes
are restored, how we restore them and what to expect from us in terms of
restored boxes and parts. Much of this applies to boxes that we might
restore for you, as well as the restored boxes we sell outright.
Use the index below to navigate this page, it contains lots of information on heater boxes. |
|
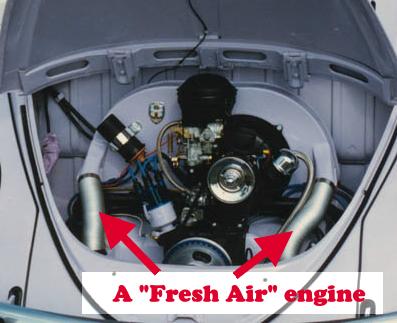
What boxes do you restore? We restore all 25 and 36hp "Stale Air" heater boxes used on VW Beetles and Buses. "Stale Air" refers to the 1962 and earlier heating systems (25, 36 and the earlier 40 hp engines) in which the same air that was blown across the heads and cylinders was also blown into the car for heat when the boxes were engaged. In these systems, a large square flap in each side of the lower heating channel was closed off when the cable was pulled preventing the warm air from escaping out of the back of the lower engine, and instead forcing it toward the front through the heater box. The '51 and later heater boxes also had a flap that opened to the ductwork going forward into the cabin. These systems work well as long as the engine is in good shape and clean. But a dirty and oily engine makes for smelly air in the cabin when the heat is turned on. And worse case, if there were any leaks in the exhaust system, the gas is quickly vented into the cabin.
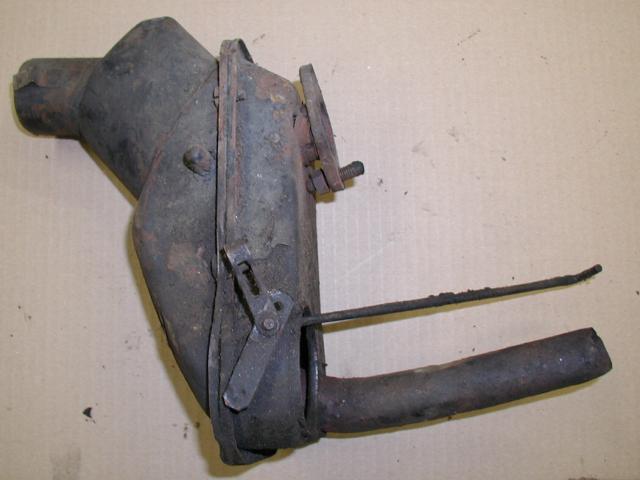
The availability of good, restorable stale air heater boxes is dwindling. Limited production of spares has made finding good early correct boxes very difficult. Only the latest versions of these were ever produced post-production for repair parts as they were interchangeable with the earlier versions. And of course real problem is that when the pipes rust out, there is no easy solution to replace them. The whole box must be replaced. We currently do not restore the 40hp heater boxes What are the different kinds of stale air boxes and what is correct for my VW? There are 3 basic types of stale air heater boxes, often erroneously referred to as KDF, 25hp and 36hp respectively. And within each type, there are some subtle differences that give clues to the over age of the boxes.
As there are no flaps in these boxes, there are no levers for heater cables to connect to either. The heater control cables connected to a special mechanism in the lower heater channel tin (often called "shoeboxes") that moved the flaps in the them. The shoeboxes had 2 flaps in them. These heater boxes and their compatible lower heater channel tin are very rare.
|
 The
next type of box is often called the "square head" box, noted by a square-ish
protrusion on the top of each in which the flap mechanism resided. These
boxes superseded the flapless style in April of 1951 and were used in production
until March 3, 1958. The earliest of these boxes had M6 nuts and bolts
with round slotted heads holding their halves together. The pivoting lever
inside in the front half was also of a slightly different design than the
later models of this box. The
next type of box is often called the "square head" box, noted by a square-ish
protrusion on the top of each in which the flap mechanism resided. These
boxes superseded the flapless style in April of 1951 and were used in production
until March 3, 1958. The earliest of these boxes had M6 nuts and bolts
with round slotted heads holding their halves together. The pivoting lever
inside in the front half was also of a slightly different design than the
later models of this box.
The second generation of this box had 9mm hex head sheet metal screws with a "dog" point holding the halves together. |
 The
last version of the stale air box had a significantly redesigned front
and rear half with each being pressed out of a single piece of steel (except
for the outlet duct on the forward halves), the square protrusion for the
flap was now gone. These boxes started in March 1958. Early versions
of these boxes used the 9mm sheet metal screws like the later versions
of the previous style. The later versions of this box (as virtually all
of the post production replacement parts) had bend over tabs that held
the halves together. Some versions of these boxes still had the sheet metal
screw holes even though they used the tabs to hold them together. The
last version of the stale air box had a significantly redesigned front
and rear half with each being pressed out of a single piece of steel (except
for the outlet duct on the forward halves), the square protrusion for the
flap was now gone. These boxes started in March 1958. Early versions
of these boxes used the 9mm sheet metal screws like the later versions
of the previous style. The later versions of this box (as virtually all
of the post production replacement parts) had bend over tabs that held
the halves together. Some versions of these boxes still had the sheet metal
screw holes even though they used the tabs to hold them together.
The last style of this box
was the 40hp setup used only in '61 and '62. In an effort to improve
the engine to |
|
How are the boxes restored?
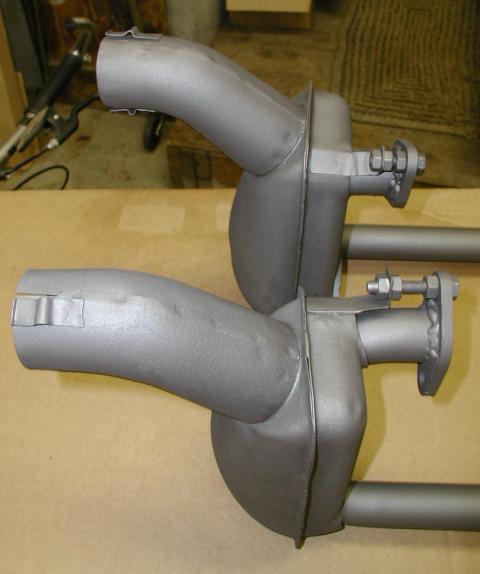
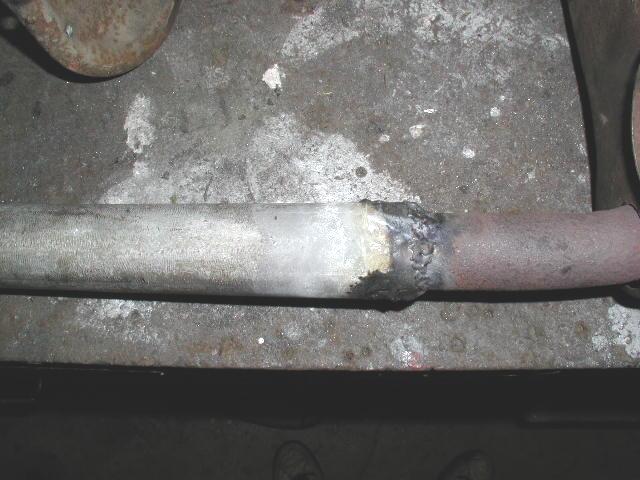
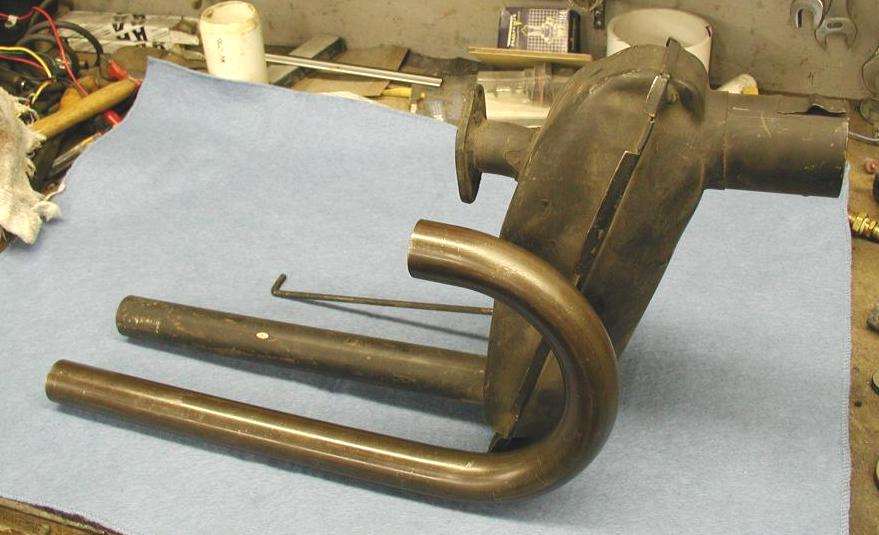
But none of this is necessary any more as ZARWerks has had reproduced replacement J pipes that are of the original external specification, and slightly thicker wall thickness for durability. These pipes are custom made for us (that means you won't find them sold anywhere else!) out of mild steel, seamless tubing. Wall thickness is .083". Laser cut 1/4" thick flanges are also available and used in every heater box restoration we do. The restoration process starts
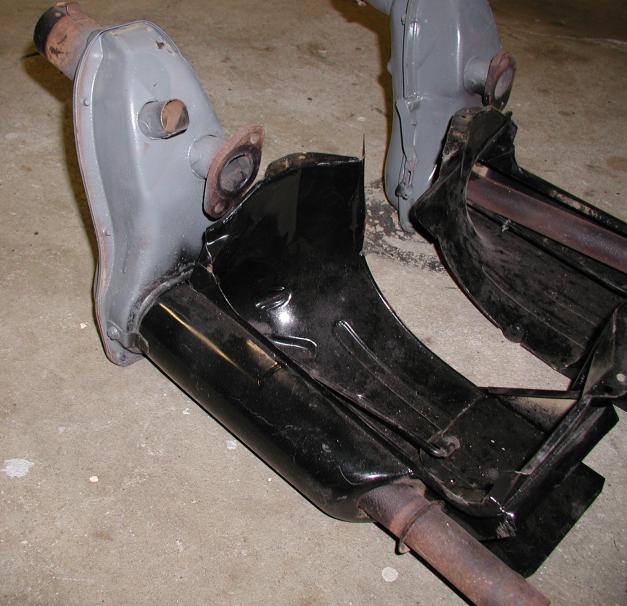
by disassembling the box halves and cutting the old J pipe out. The weld
points are broken, and the pipe is cut just as it exits the box on the
lower end. This allows the pipe to be rotated out of the box with the flange
still on it. The next step is to solvent clean the box. Many of them share the layers-thick sludge of road grime and oil that the rest of the engine underside sees. Once they are cleaned, they are assessed for re-buildability. Most dents and bends are straightened here, and the flap mechanism is examined for any problems or missing parts. Seized actuating levers can be freed up. On the square head boxes the main pivoting lever is removed and is cleaned and painted separately. Rusty or worn springs are removed and replaced later. Then the box halves are media blasted and stripped to bare metal inside and out. After this is done, they are re-examined and any addition straightening or dolly work is carried out. Any holes or metal tears are welded at this point and dressed. The front halves are then painted inside and out and they will have no welding done to them. In the grade one restoration, each fastener is wire brushed, examined and replaced if needed, and painted also.
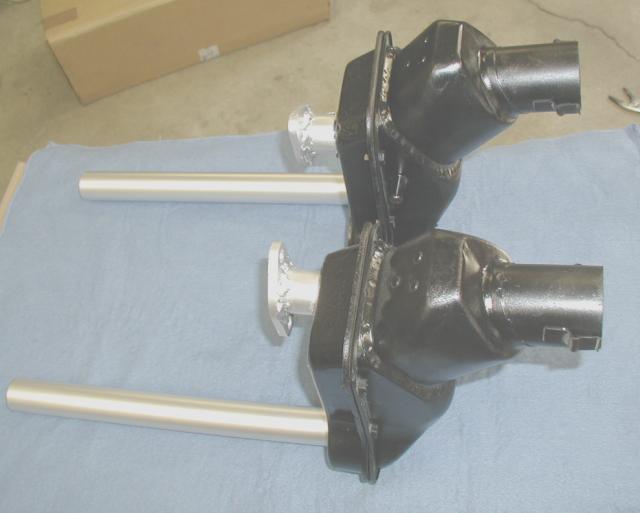
The J pipe is masked off, and the housing is cleaned with solvent. Any last minute visible weld dressing is done here as well, then the housing is shot with the black epoxy enamel. Once dry, the halves are re-assembled and the flap mechanism checked for operation. If the exposed J pipe is to be painted with the POR-20 high temp paint, the housing is masked off, the pipe surface finished and the manifold gray paint is shot. The whole assembly is then baked for 1-2 hours at 400 degrees farenheit. Why the grading of condition? The final condition and appearance of restored heater boxes is determined by their original condition prior to restoration. Remember that we are talking about 40-50 year old parts here. It is rare to find restorable boxes that aren't dented, rusted, torn or otherwise mangled somehow. And by far the worst is if previous repair/restoration "attempts" have been undertaken. But we must also keep in mind that these parts are used on the engine, are not visible from the engine bay and only barely visible if you get on your knees and look up under the car. For this reason, many enthusiast's primary objective is to get a good set of boxes with function the foremost priority, and appearance taking the back seat. But of course, there are
those for which nothing but perfection will suffice. For those people we
weed out the very best boxes, the ones that have not been previously hacked,
or rusted to the point of pitting, or dented and mangled. Great care is
spent on these boxes in the area of appearance and correctness.
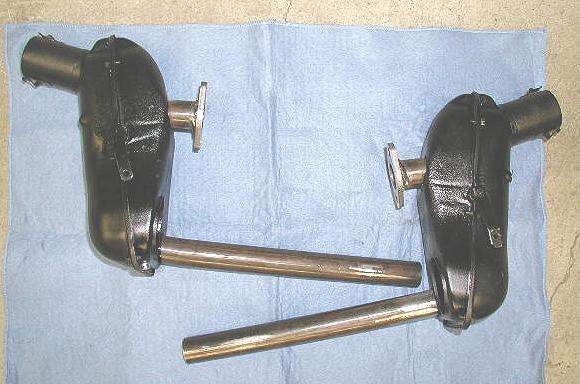
Grade Two Boxes: These boxes are restored
with the same process as the grade one boxes, but are priced lower. They
too are disassembled, stripped of old pipes and flanges, cleaned and media
blasted. Obvious bends and dents in the housings are straightened, and
new pipes and flanges are installed on the welding jig and when done, they
are painted inside and out with semi gloss black epoxy enamel. What separates
these boxes from the grade one boxes is that there may be imperfections
in the box housings and evidence of repair. There may also be some metal
pitting visible under the paint and the pipe openings in the housings may
be slightly irregular. But these boxes will be as functionally perfect
as the grade one boxes and should be expected to serve your warm air needs
for many years to come. E-mail us if you have specific questions about
a set of boxes that are available, we may be able to send you detailed
pictures that show you why a particular set of boxes didn't make grade
one.
Grade One Boxes: These heater boxes are restored
with the nit-picky enthusiast in mind. In addition to the basic mechanical
restoration steps, extra care is taken in the finishing detail. Screw and
bolt hardware will be carefully cleaned and painted and correct on these
boxes. And perhaps most importantly only the best restoration candidates
are chosen for grade one boxes. There must be no substantial metal tearing
or previous patch work done and no substantial rust pitting. All surfaces
must be smooth and uniform, even the flap mechanism inside is carefully
cleaned and painted. All welding will be either contained inside the box,
or carefully dressed so it is undetectable (except for the flange weld).
These boxes are worthy of the very best (and correct!) vintage restorations.
Can I restore my own boxes? Of course you can, but you
need to have a MIG welder and be familiar with basic metal working tools
and techniques. Zarwerks sells heater box
restoration kits which include a pair of pipes and pair of flanges.
Or you can buy the pipes and flanges individually if you want. if
you are restoring your early VW's engine and it is removed from the car,
you can use it as your own "alignment jig" to fit up the pipes correctly
and tack weld them. You will not do any damage to your engine doing
this. You cannot properly restore boxes without the use of an engine
(or jig) with heads, lower tin and a muffler in place. If you don't
get the parts aligned right, the boxes will never fit up to the heads and
lower tin correctly.
Very soon, detailed instructions
on heater box restoration will be completed and printed and included with
each J pipe order from Zarwerks.
|
JH 10.31.03