
Split Window Pod Restoration and Parts
| This page will explain some of the pod restoration capabilities that Zarwerks offers. We do offer some of these parts for sale outright on our new parts page but suggest having Zarwerks install them. We have the proper techniques, experience, and tooling to minimize any damage that may incurred while installing parts that were not designed to be replace. All pod restorations will be quoted after the part has been inspected or detailed pictures have been received. Any over runs in cost will be confirmed with the customer before the work is preformed. Click the link below to inquire or e-mail direct to jim@zarwerks.com
|
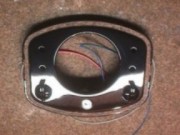
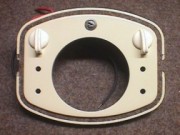
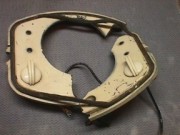
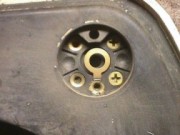
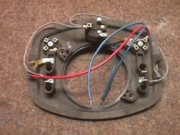
| There are basically 3 types of pods that were made. The KDF or Kubel Wagon pod had large switches and a different dash light indicator position (the colors were in different locations). The standard pod was used on "standards" or non-export cars up until the oval dash was introduced in 53. The deluxe pod was used from late 49 until the introduction of the oval dash also. The obvious difference was the standard pod was painted black and the deluxe pod was ivory. Some other subtle differences are the standard pod had a 95mm opening for the speedometer and the bezel did not protrude thought the opening in the pod. the ivory deluxe pod has a 100mm opening and the speedometer bezel is designed to protrude through the pod. |
|
||||
|
Below is a list of some of the common problems Zarwerks can fix or replace on Split Window Pods.
|
* Requires some rivets to be drilled out and re-installed with brass or plated machine screws (customers preference).
|
||||
|
|
We can do from basic painting to full reconstruction. The first thing to do is remove the switches and the dash light contacts if necessary. This is done by carefully grinding off the rivets. Then the old paint is stripped from the pod using a special paint stripper, and the entire pod is bead blasted to prepare the surfaces for primer. The bead blasting will also clean all the brass contacts for a solid electrical connection. A top quality 2k surfacing primer is used, sanded, and followed by an sealer to prepare it for painting. A special custom tinted urethane single stage paint is used for a durable finish. It is then wet sanded and buffed out to a high gloss.
|
||||
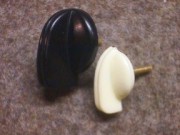
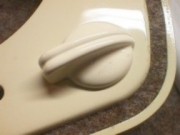
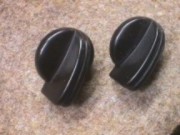
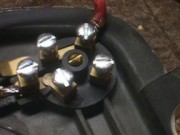
The switches can be replaced with reproduction color cast replicas or the original switches can be buffed out or painted if needed. If there is any cracking or yellowing the switch will need to be painted. Slight yellowing may be able to be buffed out. The switches are then re-installed with small brass screws from the back. All contacts are re-grease before installation. Then the switch is tested with a continuity tester to make sure it functions properly. |
|
||||
|
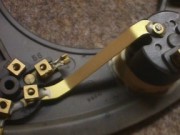
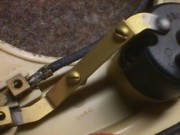
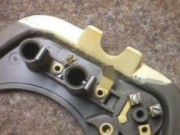
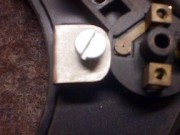
One common problem encountered on used pod is the bus bar that feeds the ignition switch is cut to remove or replace the ignition switch cap. Zarwerks can completely replaced or repair the existing bus bar. Some customers choose to use screws to attach the bus bar for ease of removal and to keep the cost down. When replacing the bus bar a special technique is used to recreate the rivet contact. A special countersunk screw is used and the end peened over to permanently secure it to the electrical wire contact block.
All contact areas are completely bead blasted for full electrical conductivity. |
||||
|
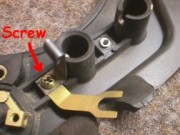
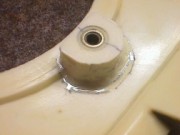
Another item that is often broken on these pods are the ground tab. These are offered by Zarwerks as a reproduction item. The dash indicator light that is sitting on top of the ground tab is often rusted and making a poor contact. We can remove the contact, bead blast, and re-nickel plate it. Both of these items are then re-installed with a small machine screw and tested for continuity. |
|
||||
|
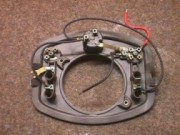
The pods are then re-wired using braided cloth wire for early pods and PVC wire for later (mainly) bus pods. They can be wired either way, customers choice. We try to re-use the old ring terminals but to do the age of these pods they become brittle and sometimes break. We can replace these terminals but it requires grinding out the rivet and installing screws. If these rivets are already being removed for other reasons new terminals will be installed. They are then crimped and soldered as was originally done at the VW factory. |
||||
|
|
Major sections can be repaired/replaced. We have spare pieces that can be patched and also common sections such as mounting ears and inserts available as reproduction pieces. |
||||
| Finally new screws are available and also the speedometer and clock brackets. The ignition switch can also be tested if the key sent along. We can do some basic re-keying but have a source for keys if needed.
|
|
||||
Other items and services also available. E-mail use with any questions or price quotes.
|
|||||

JB 03.21.03 DW